7 minutes
My First dApp
I decided to write a simple web application that interacts with an Ethereum smart contract to learn the process and get a feel for how all the various pieces fit together.
The Basics
Ethereum Node
The application requires an Ethereum node to actually interface with the network. I went with Infura.io to manage my test node to get up and running quickly. Infura provides a dashboard for you to manage security such as JWT and various whitelists and see a breakdown of all the requests hitting your project’s endpoint. You could also run your own node, the most popular project seems to be Geth.
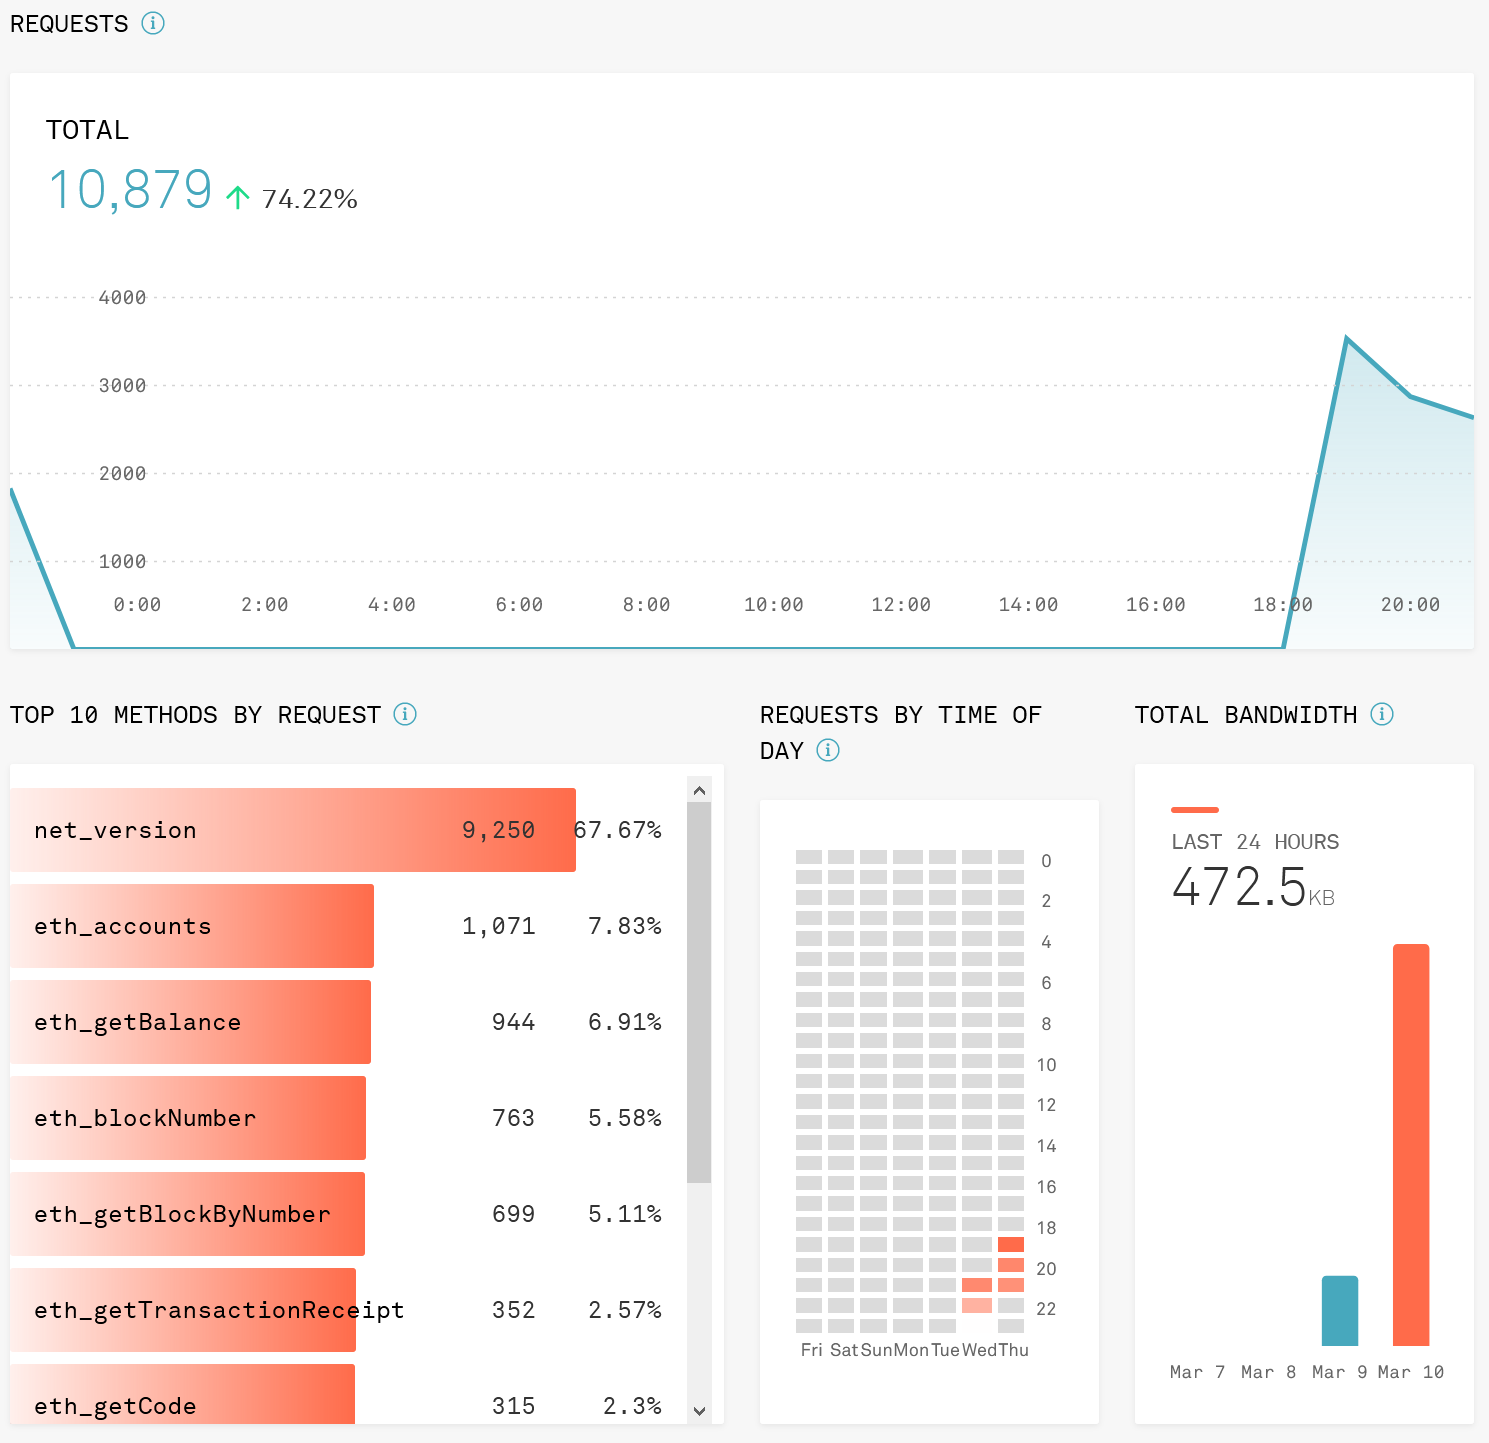
Infura dashboard
Wallet
While it is possible to manage the wallet completely within the Javascript library I use, I decided to use MetaMask. This is the wallet I’ve been using and I like it because it interfaces nicely with web applications. The desktop version is actually a Firefox extension and the Android app has a web browser built in which injects its wallet functionality and lets you interact directly with dApps.
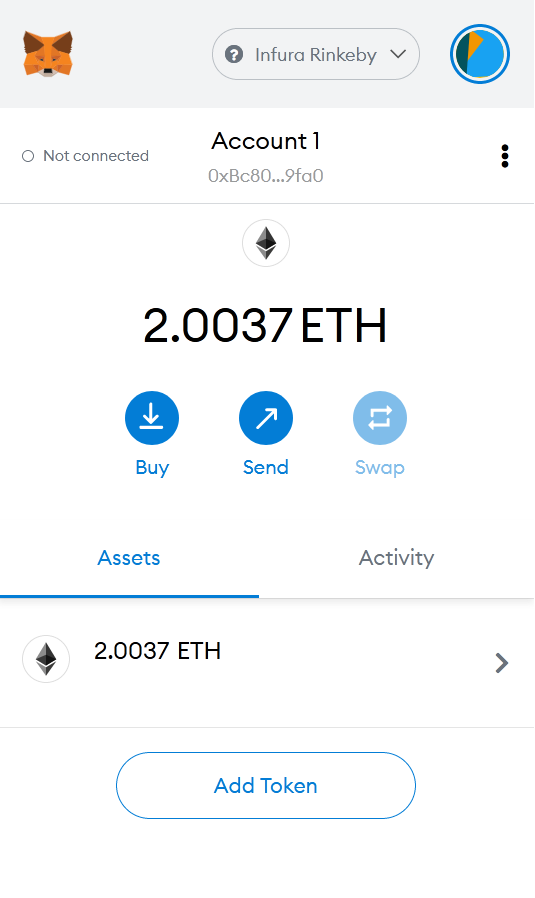
MetaMask
Testnets
There are several Ethereum testnets. Ropsten is most similar to the mainnet. Kovan and Rinkeby are less accurate simulations of the network but can be used for testing your contract. I’m going to start out with Rinkeby. MetaMask by default uses Infura’s endpoints to interface with the testnets, but I decided to add a network that pointed directly to my project’s endpoint. The built in Rinkeby endpoint and the Infura project enpoint could both be used, but by using Infura I’ll be able to see all my transactions on the dashboard.
Once you have the network added you’ll need to get Ethereum into your test wallets to spend. The official Rinkeby faucet is available and requires either Twitter or Facebook verification. You make a public post with your wallet address and then paste the link to that post on the faucet page and submit it, and shortly they will send you some ether. I also found another faucet that worked for me. MetaMask also hosts a faucet here, but unfortunately it was broken when I tried to use it.
The Smart Contract
Creating the Contract
I used Remix to deploy my smart contract. I’m just using a sample contract from Remix. It is very simple and just stores a number, and has a function for setting the number and one for retrieving it.
// SPDX-License-Identifier: GPL-3.0

pragma solidity >=0.7.0 <0.8.0;

/**
 * @title Storage
 * @dev Store & retrieve value in a variable
 */
contract Storage {

    uint256 number;

    /**
     * @dev Store value in variable
     * @param num value to store
     */
    function store(uint256 num) public {
        number = num;
    }

    /**
     * @dev Return value
     * @return value of 'number'
     */
    function retrieve() public view returns (uint256){
        return number;
    }
}
First you load the contract then compile. Then go to the deploy tab and select the “Injected Web3” environment to use MetaMask, and make sure you have your Infura testnet network selected. You could also use another node or your own local node by selecting “Web3 Provider”. I just left all the gas settings default for now until I figure out some values that make sense. Your contract requires gas to execute on the Ethereum virtual machine.
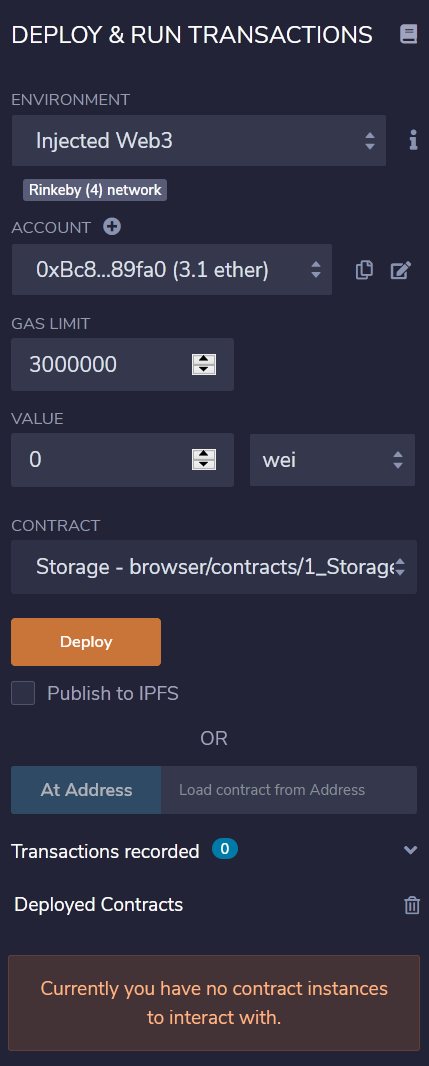
Deploying contract with MetaMask
Deploying the contract requires a wallet to sign it, and gas for the transaction. Every transaction requires gas, and this can be provided by users of the contract and/or you can fund the contract’s wallet address directly.
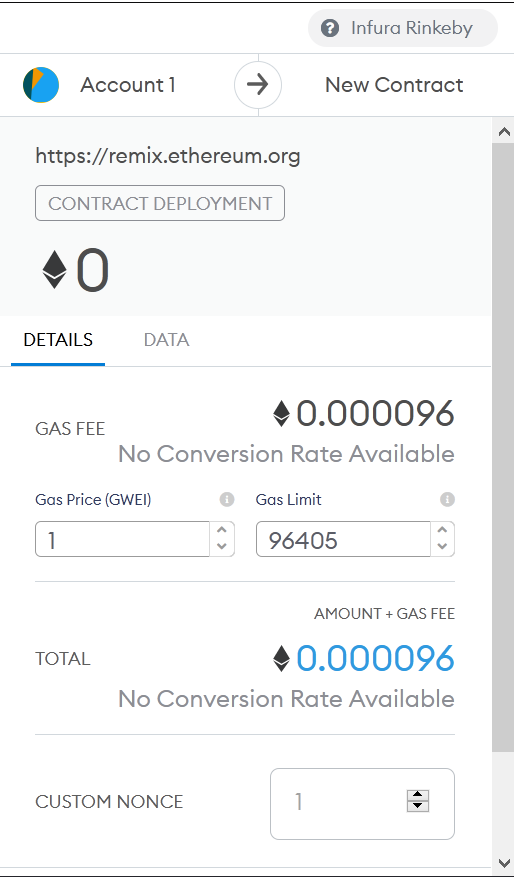
Deploying contract with MetaMask
And then you should see some output in the Remix console if it was successfully deployed.

Successful contract deployment
You can then test the contract in Remix at the bottom of the deployment panel. This contract stores a number and has two functions, store and retrieve.
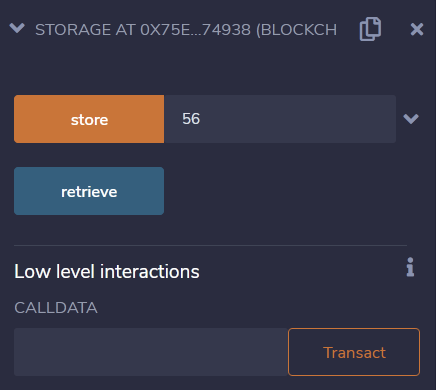
Contract functions
When you run a function, it will pop open a MetaMask window where you can confirm the transaction and set the gas amount you want to pay. The storage function costs gas to actually store the value, and the retrieve is free.
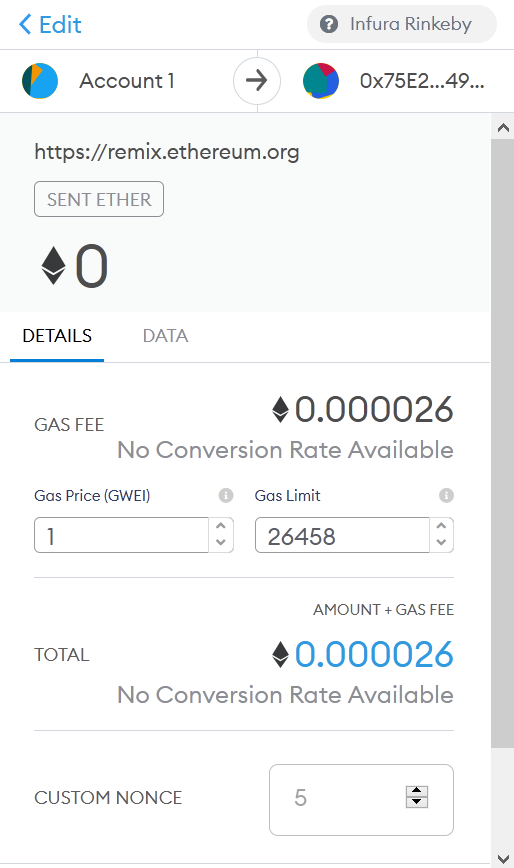
Approve contract transaction
The contract is now deployed to the testnet.
Web Application
I went with web3.js mostly because I had heard of it before. I found this article very helpful for some examples. Ethers.js is also available. These libraries provide the basic functionality for interacting with an Ethereum node.
The first step is to create an instance Web3, which requires a provider. Web3.givenProvider will allow you to use MetaMask if you have that installed:
const web3 = new Web3(Web3.givenProvider);
You can also use any other node you have access to. Here is an example for an Infura node:
const network = 'https://rinkeby.infura.io/v3/<project id>';
const web3 = new Web3(new Web3.providers.HttpProvider(network));

// You can also fallback to a public node like this
const web3 = new Web3(Web3.givenProvider || network);
You’ll need the ABI from Remix in your code to create an instance of the Web3 contract option. You can copy the ABI from the bottom of the Solidity Compiler tab.
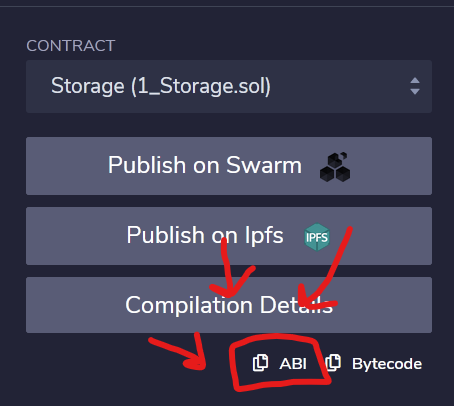
Copy the ABI from the compiler tab
This is a JSON representation of the contract and its functions. It looks like this:
[
	{
		"inputs": [
			{
				"internalType": "uint256",
				"name": "num",
				"type": "uint256"
			}
		],
		"name": "store",
		"outputs": [],
		"stateMutability": "nonpayable",
		"type": "function"
	},
	{
		"inputs": [],
		"name": "retrieve",
		"outputs": [
			{
				"internalType": "uint256",
				"name": "",
				"type": "uint256"
			}
		],
		"stateMutability": "view",
		"type": "function"
	}
]
You can then instantiate the contract instance and call it like so:
contract = new web3.eth.Contract(abi, "<contract address>");

contract.methods.retrieve().call((error,result) => {
    if(error) console.error(error);
    if(result) console.log(result);
})
When calling the store function you’ll need to provide ether, which requires a gas payment. A call to the store function looks like this:
contract.methods.store(this.state.value).send({
	from: '<MetaMask wallet address>',
	gas: 41446,
	gasPrice: 1,
	gasLimit: 41446
})
.then((error,result) => {
	if(error) console.error(error);
	if(result) console.log(result);
});
And then you’re interacting with your smart contract from a web application! This turned out to be a lot easier than I thought it would be. The libraries are fairly mature and using MetaMask makes it very easy to sign your transactions. Web3 is also capable of generating its own wallets if you don’t want to use MetaMask.
Here is my entire React component:
import React from 'react';
import styled from 'styled-components'

const Web3 = require('web3');
const Button = styled.button``;

// The ABI describes the contract and can be copied out of Remix
const abi = [
	{
		"inputs": [
			{
				"internalType": "uint256",
				"name": "num",
				"type": "uint256"
			}
		],
		"name": "store",
		"outputs": [],
		"stateMutability": "nonpayable",
		"type": "function"
	},
	{
		"inputs": [],
		"name": "retrieve",
		"outputs": [
			{
				"internalType": "uint256",
				"name": "",
				"type": "uint256"
			}
		],
		"stateMutability": "view",
		"type": "function"
	}
]

class Contract extends React.Component {
    state = {
        value: 0
    }

    constructor(props) {
        super(props);

        // You can use a public node, your private Infura project endpoint, or interact through MetaMask via Web3.givenProvider
        const network = 'https://rinkeby.infura.io/v3/<project id>';
        const web3 = new Web3(Web3.givenProvider || network);

        this.con = new web3.eth.Contract(abi, "<contract wallet address>");
    }

    render() {
        return (
            <div>
                <p>Contract!</p>
                <p>{this.state.value}</p>
                <input onChange={this.handleInput} value={this.state.value} />
                <Button onClick={this.retrieveValue}>Retrieve</Button>
                <Button onClick={this.setValue}>Set</Button>
            </div>
        );
    }

    handleInput = event => {
        this.setState({value: event.target.value})
    }

    retrieveValue = () => {
        console.log("Retrieve")
        this.con.methods.retrieve().call((error,result) => {
            if(error) console.error(error);
            if(result) {
                console.log(result);
                this.setState({value: result});
            }
        })
    }

    setValue = () => {
        console.log("Set")

        this.con.methods.store(this.state.value).send({
            from: '<MetaMask wallet address>',
            gas: 41446,
            gasPrice: 1,
            gasLimit: 41446
        })
        .then((error,result) => {
            if(error) console.error(error);
            if(result) console.log(result);
        });
    }
}

export default Contract;
Also available as a snippet on Gitlab here
I believe there is also functionality with MetaMask to pull the wallet address automatically based on what account the user has selected, but I’ll leave that as an exercise to the reader to investigate. I hope you’ve found this useful. If you’re interested in blockchains and have any questions, or just want to chat, please feel free to hit me up on Twitter @VenatioDecorus.